.svg)


The contest was simple: Shoot three different locations around Seattle for 24 hours, and create a time lapse using PolarPro ND Quartzline filters, and Rhino Camera Gear’s new EVO Slider.
Time lapse photography is a great way to add a dynamic touch to your video project, condensing photos shot over a long period of time into a short video clip to help move your story along.
Why shoot a time lapse? Well, besides breaking up your shot types to keep the viewer engaged, a time lapse can help convey a passing sense of time, like day to night, or can connect two separate timelines together to further develop your cinematic narrative.
A well placed time lapse can also show a change in weather, subject placement, or change in mood, and can help to capture your audience’s attention.
A time lapse is basically a series of photos taken at a set interval over a long period of time and is then stitched together to make a short video clip.
Depending on the scene and the speed of your subjects in frame, you may want to use a slower or faster interval. Standard time lapse intervals include 1s, 2s, 5s, and 10 seconds.
So, what makes for an interesting time lapse? Let’s check out how our team tackled the time lapse contest.
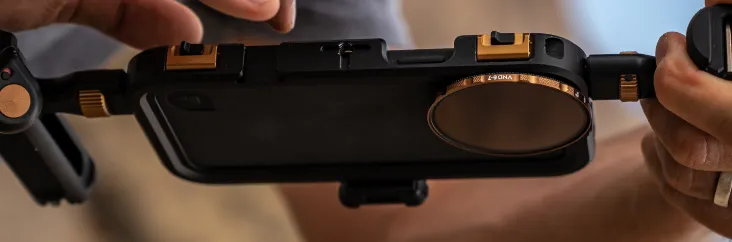
Neutral Density filters
First, ND filters. ND filters help control camera shutter speed, and for this contest, our team used them to control shutter speed to create smooth and cinematic motion blur in each time lapse sequence.
Location 1: Fremont Bridge
When shooting your time lapse, it’s important to set your focus, shutter speed, aperture, ISO and white balance manually. Auto mode can cause flickering, color shift or focus shifting as the time lapse takes place, so switch it Manual mode.
Because your camera is taking a photo at a set interval and over a long period of time, anywhere from an hour to a full day depending on what you are shooting, any movement or bumping into the camera will ruin your time lapse. If you have a remote shutter release, use it!
At Fremont Bridge, we shot two time lapse sequences, one with a 1-second interval and one with a 5-second interval of the drawbridge opening and closing and the flow of traffic there.

Location 2: Pier 55
When our team hit Pier 55 for a view of the ferris wheel at Pike’s Place, the ferris wheel was neither lit up nor spinning. While that particular shot was foiled, part of good content creation is to know how to be flexible and adapt when the situation changes. Our team found a nearby fountain that was backlight by the pier lights, and while it wasn’t the shot they had hoped for, they were still able to capture useable content.

Location 3: Sunrise with a View of the Seattle Skyline
For the last location in the 24-hour shoot, our team found a nice overpass to set up the EVO Slider and capture the Seattle sunrise. The EVO Slider is an excellent tool to create a sweeping, captivating time lapse, and features an optional motor for hands-free panning. Using a slider can set your time lapse apart from static shots in your film and balance out your content. For new or developing content creators, a slider is a simple and easy to use option to add professional production value to your project.
Determining Time Lapse Intervals
Most of the time we like to use a 1 or 2-second interval, like when shooting people, traffic, and other city movements. When we’re shooting landscapes, we generally like to slow things down since the movement we’re capturing, like moving water or rustling leaves, is often slower than the pace of city life (even in sleepy Seattle).
A 5 second or 10-second interval is usually more appropriate for natural scenes. Seattle is an interesting city to shoot because the cityscape is constantly competing with the natural environment, and the wet and inclimate weather provides some blue and moody conditions to shoot. These types of conditions, combined with moving clouds, can produce a very interesting time lapse that exemplifies the intensity of the weather and helps to shape the tone of the overall piece.
Gauging Shutter Speed
Shutter speed controls the way that motion looks from frame to frame. We like to use around a ½ second shutter speed on our time lapse sequences, which puts a substantial amount of motion blur on anything in frame that’s moving.
When the timelapse is then played back, the little bit of motion blur, while not that noticeable in each individual frame, comes together to give a natural sense of movement, much like the way we see motion in real life.
To get shutter speed as low as ½ second, we used our QuartzLine ND 1000 filter to slow shutter speed down by 10 stops, from 1/500th to ½ second.

Recap
- A time lapse is a series of photos taken at a set interval over a long period of time and is then stitched together to make a short video clip that illustrates the passing of time.
-Time lapse photography is a great way to add a dynamic feel, condensing photos shot over a long period of time into a short video clip that helps move your story along.
-Popular time lapse intervals include 1- 2 seconds for cityscapes, or 5-10 seconds for landscapes.
- A well placed time lapse can show change in weather, subject placement, or change in mood, and can help to capture your audience’s attention.
- Use ND filters to slow down shutter speed to capture artistic motion blur in a time lapse.
-Use a camera slider like the Rhino EVO to create sweeping, arcing or panning time lapse sequences.
If you haven’t already, be sure to check out our time lapse video, and cast your vote! Voting Ends 10/1/2018 at 11:59PM!