.svg)


Can the Hero7 live up to the hype built around its gimbal-like, Hypersmooth, in-camera stabilization? We recently hit Newport harbor to find out, and we brought along our Mavic 2 Pro to get some comparison shots.
Test #1 Hypersmooth vs. 3-axis gimbal
For the first stabilization test, we hard mounted the Hero7 Black onto our Mavic 2 to see how it would perform aerially without a gimbal to stabilize the camera. We simultaneously shot video with the Mavic camera so we’d be able to compare the Hypersmooth footage to gimbal-stabilized footage.
The Hero7 footage came out better than we thought, but when hard mounted without a gimbal, you can’t actually tilt or pan the camera, and you need to physically maneuver the drone in order to change camera direction or angle. So while the Hero7 video came out smooth, it’s not very practical to film with when hard mounted on a drone like the Mavic 2. If only we had the Karma. . . .
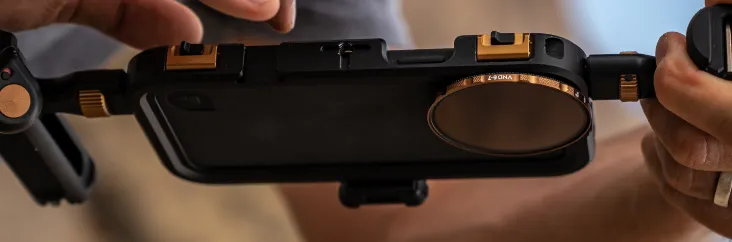
Camera settings
On the Hero7, GoPro suggests setting the max ISO limit at 400 when using HyperSmooth. We set our color profile to Flat to get the most flexibility when editing this footage, and to keep our footage consistent between cameras, we set our ISO to 400 on the Mavic and shot in Log.
Test #2 Timewarp v. Hyperlapse
The Hero7 Black features a timelapse function called TimeWarp and for our second test, we wanted to compare TimeWarp to timelapse footage taken with the Mavic 2.
In TimeWarp mode, the Hero7 Black takes a photo at a set interval while allowing you to move through the scene. It then stitches those photos together to create a super smooth, moving timelapse. This function seems to be designed to capture more casual moments, like lunch with friends, with the ability to share directly to social media.
For comparison, we set the Mavic 2 into Hyperlapse mode, which is the equivalent of the Hero7’s TimeWarp.
To set up a Hyperlapse on your Mavic 2, hit the controller icon on the left side of your screen, and select Timelapse, and then you have the option of several different Hyperlapse shots.
Since we were shooting with the drone on the ground, we chose the Free mode, which lets you control the camera angle and also the altitude of the drone (if you are flying). Since we handheld the drone, the camera was a little harder to keep level and focused on our subject, but we took a shot anyway, using our Katana camera tray.
Test #3 Super Slow-mo
For our next test, we shot some wakeboarding behind our boat. To change up the pace of our video, we shot at 1080P@240fps to capture footage that’s 8x slower than normal.
We used a tube to get close to the water and as close to the action as possible since the Hero7 has such a wide FOV. To round out our perspective, we also shot a second tracking shot from the air with the Mavic 2, and then we looked at how the two cameras performed, with attention to how the wakeboarding action looked from each perspective.
From an aerial perspective, the action behind the boat gets a bit lost, especially with the wide FOV of the Mavic 2. The Hero7 footage up close better exemplifies the action and feels more immersive.
Test #4 freediving in Catalina
For our last test, we headed to Catalina Island where our friend Shelby took the Hero7 freediving.
Since we couldn’t take the Mavic 2 underwater, we set it Tripod mode and hovered above the surface to capture one last aerial perspective to round out our video.
Check out the full video on our youtube channel, and be sure to subscribe to our newsletter to stay current on everything PolarPro.